


Step 1: FLUSHING THE WATER PASSAGES
After operation in muddy, brackish, or salt water, you should flush the water passages and motor surface with clean, fresh water.
If you do not flush the water passages, salt can corrode the motor and shorten its life. Flush the water passages as follows.
Step 2: ENGINE RUNNING – Vertical position –
Suzuki recommends that you flush the water passages using this method.
To flush the water passages, you must obtain a commercially available engine flush device.
Exhaust gas contains carbon monoxide, a dangerous gas that is difficult to detect because it is colorless and odorless. Breathing carbon monoxide can cause death or severe injury.
Never start the engine or let it run indoors or where there is little or no ventilation.
Failure to take proper precautions when flushing the water passages can be hazardous.
When flushing the water passages, always take the following precautions:
• Make sure that the engine remains in NEUTRAL. If shifted into gear, the propeller shaft will turn and could cause severe personal injury.
• Make sure the motor is properly clamped to a secure stand or boat, and remain in attendance until flushing is completed.
• Keep children and pets away from the area, and stay clear of all moving parts.
Severe engine damage can occur in as little as 15 seconds if the engine is started without supplying water to the cooling system.
Never start the motor without supplying water to the cooling system.
- Remove the propeller.
- Install the flushing attachment (1) so that the water intake holes are covered by the rubber cups on the attachment.
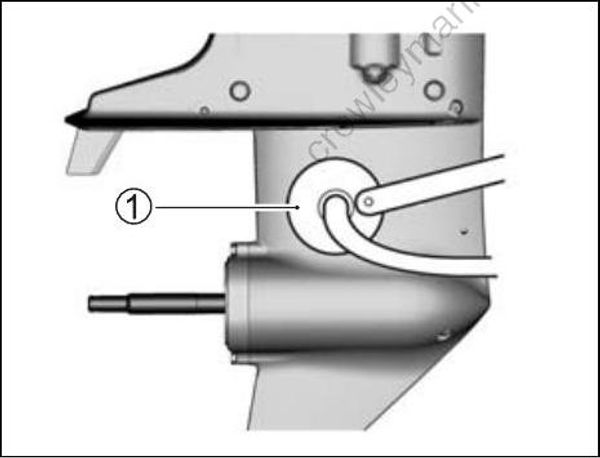
Connect a garden hose to the flushing attachment and turn on the water to obtain enough flow so that plenty of excess water is flowing out from around the rubber cups on the attachment.
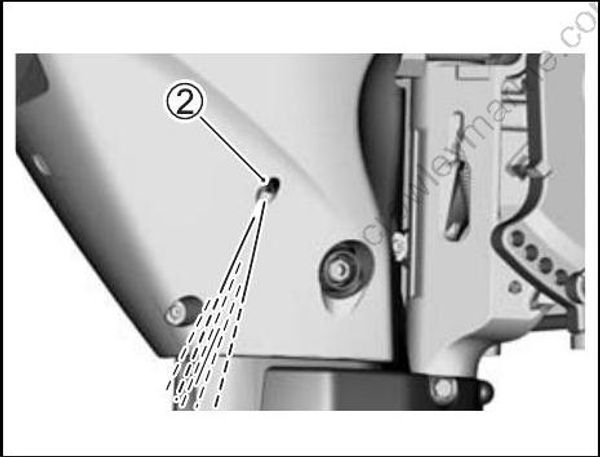
Shift into “NEUTRAL” position and start the motor. As soon as the engine starts, water should spray out of the pilot water hole (2), indicating proper water pump operation. If no water spray is evident, stop the motor immediately and consult your dealer.
- Allow the engine to run only at idle speed while flushing. Readjust the water flow, if necessary, so that there is still plenty of excess water flowing out from around the rubber cups.
- Allow the water to continue circulating for a few minutes.
- Stop the motor, then turn off the water.
- Remove the flushing attachment.
- Clean the motor surface and apply a coat of automotive wax on the external finish of the motor.
Step 3: ENGINE NOT RUNNING – Vertical position –
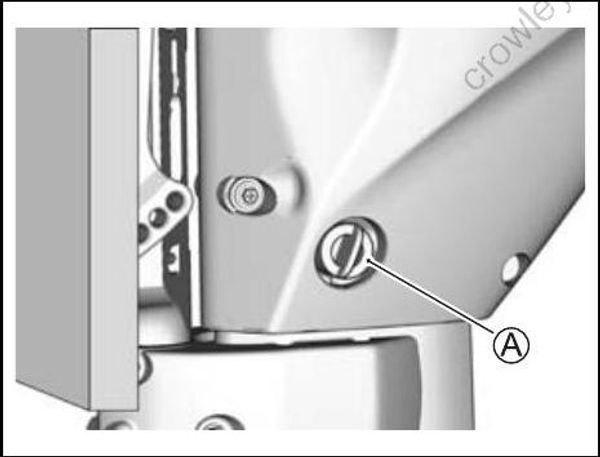
- Remove the plug (A) from the flushing port.
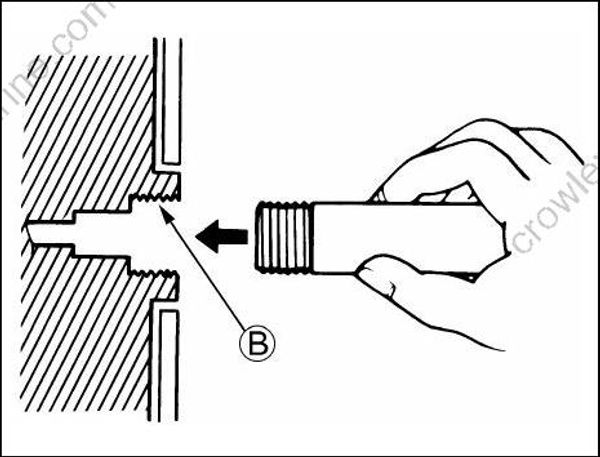
- Install a garden hose directly or by using a hose connector matched to the flushing point thread (B).
Thread (B): 0.75 – 11.5 NHR (American standard hose coupling threads for garden hose applications.)
The hose connector (flushing attachment) matched to the flushing point thread (B) is included in the crate parts.
- Turn on the water to obtain a good water flow. Flush the engine for about five minutes.
- Turn off the water.
- Remove the hose and connector (if used) then reinstall the plug into the flushing port.
- Leave the motor in a vertical position until the engine is drained completely.
Step 4: ENGINE NOT RUNNING – Full tilt up position –
Raise the engine to the full tilt up position.
Follow the “ENGINE NOT RUNNING – Vertical position” instructions.
DO NOT RUN ENGINE IN THE FULL TILT UP POSITION.
Lower the motor to a vertical position until the engine is drained completely.